스프링 핵심원리 기본편 - 컴포넌트 스캔
1. 컴포넌트 스캔
스프링이 관리하는 컨테이너 내에서 개발자가 정의한 빈(Bean)을 자동으로 찾아서 스프링 컨테이너에 등록하는 메커니즘
2. 컴포넌트 스캔의 필요성
컴포넌트 스캔을 하지 않으면 아래 코드와 같이 @Bean으로 일일이 등록해줘야한다.
실제 개발환경에서는 훨씬 많은 빈(Bean)이 등록될텐데 이런 반복되는 작업을 컴포넌트 스캔으로 줄일 수 있다.
@Configuration //설정정보에 적어주는 어노테이션
public class AppConfig {


    @Bean  //스프링 컨테이너에 등록이 된다.
    public MemberService memberService(){
        return new MemberServiceImpl(memberRepository());
    }

    @Bean
    public MemoryMemberRepository memberRepository() {//구현객체를 반환해주는 역할
        return new MemoryMemberRepository();//생성자 주입
        //MemberServiceImpl이 필요로 하는 MemberRepository 의존성을 외부에서 주입
    }

    @Bean
    public OrderService orderService(){
        return new OrderServiceImpl(memberRepository(),discountPolicy());
    }

    @Bean
    public DiscountPolicy discountPolicy(){
        return new RateDiscountPolicy();
    }
}
3. 컴포넌트 스캔 사용법
@Configuration
@ComponentScan(basePackages = "hello.core.order")
public class AppConfig {
    // 추가적인 빈 정의
}
1. 설정정보를 자동으로 등록하기 위해 @Configuration 어노테이션을 붙여준다.
2. @ComponentScan 어노테이션을 쓰면 컴포넌트 스캔을 할 수 있다.
3. 괄호안에 basePackages는 'hello.core.order' 하위 패키지에서 @Component와 같은 어노테이션이 붙은 클래스를 스캔하여 스프링 빈으로 등록하겠다는 의미다.
💡basePackages를 명시하지 않으면 @ComponentScan이 붙어 있는 설정 클래스의 패키지를 기준으로 컴포넌트 스캔을 시작한다.
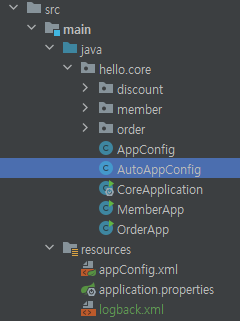
실제 강의 패키지 경로다. hello.core.order로 basepackages를 설정하면 order의 하위에 있는 클래스들만 스캔한다.
(※@Component 어노테이션이 붙은 클래스만!)
4. 의존관계 주입(@Autowired)
@Bean 으로 빈을 수동등록했을 때는 아래와 같이 의존성을 직접 주입했다.
@Bean  //스프링 컨테이너에 등록이 된다.
    public MemberService memberService(){
        return new MemberServiceImpl(memberRepository());//생성자 주입
        //MemberServiceImpl이 필요로 하는 MemberRepository 의존성을 외부에서 주입
    }
하지만, 컴포넌트 스캔을 사용하면 아래와 같이 의존성을 직접 주입하는 코드가 없다.
패키지 하위 클래스들의 @Component들을 스캔하며 빈 등록을 할 뿐이니 말이다.
@Configuration //설정정보 어노테이션
@ComponentScan(
        excludeFilters = @ComponentScan.Filter(type = FilterType.ANNOTATION, classes = Configuration.class)//AppConfig를 등록하지않도록 필터링
) //컴포넌트 스캔 일일이 @bean 등록안해도됨
public class AutoAppConfig {

}
(참고로, excludeFilters는 다른 AppConfig파일은 빈으로 등록하지 않겠다는 의미다.)
그래서 의존성 주입을 할 수 있는 어노테이션이 있는데 그게 바로 @Autowired다.
	@Autowired //의존관계 주입 Type에 맞는 MemoryMemberRepository를 주입해줌.
    public MemberServiceImpl(MemberRepository memberRepository) {
        this.memberRepository = memberRepository;
    }
이렇게 의존성 주입이 필요한 클래스에 @Autowired를 붙여주면 타입이 같은 빈을 찾아서 의존관계를 자동으로 주입해준다.
	@Autowired
    public OrderServiceImpl(MemberRepository memberRepository, DiscountPolicy discountPolicy) {
        this.memberRepository = memberRepository;
        this.discountPolicy = discountPolicy;
    }
생성자에 파라미터가 많아도 자동으로 의존관계를 주입한다.
5. 컴포넌트 스캔의 기본 대상
- @Component: 가장 기본적인 컴포넌트 어노테이션.
- @Repository: 데이터 리포지토리 역할을 하는 클래스에 사용되며, 데이터 액세스 예외를 스프링 예외로 변환하는 기능을 제공
- @Service: 비즈니스 로직을 처리하는 서비스 계층의 클래스에 사용. @Service에 대한 특별한 처리는 없고 비즈니스 계층을 인식하는데 도움이 된다.
- @Controller: 웹 요청을 처리하는 컨트롤러 계층의 클래스에 사용. MVC 패턴에서 컨트롤러로서의 역할.
- @Configuration: 스프링 설정 정보를 담고 있는 클래스에 사용되며, 빈 정의와 의존성 주입 설정을 포함한다.
6. 빈 이름의 중복과 충돌오류
보통 수동 빈 등록, 자동 빈 등록이 함께 이뤄지는 경우 오류가 잦다.
예시를 보면,
✅AutoAppConfig 설정정보
@Configuration
@ComponentScan(
        excludeFilters = @ComponentScan.Filter(type = FilterType.ANNOTATION, classes = Configuration.class)//AppConfig를 등록하지않도록 필터링
)

public class AutoAppConfig {
    @Bean(name = "memoryMemberRepository")
    public MemberRepository memberRepository() {
        return new MemoryMemberRepository();
    }
}
'memoryMemberRepository'가 자동 빈 등록이 되는데 AutoAppConfig에서 @Bean으로 수동 등록해줬다.
✅테스트 코드
public class AutoAppConfigTest {
    @Test
    void basicScan(){
        AnnotationConfigApplicationContext ac = new AnnotationConfigApplicationContext(AutoAppConfig.class);
        MemberService memberService = ac.getBean(MemberService.class);
        Assertions.assertThat(memberService).isInstanceOf(MemberService.class);

    }
}
✅테스트코드 실행 결과(충돌오류X)
Overriding bean definition for bean 'memoryMemberRepository' with a different definition: replacing [Generic bean: class [hello.core.member.MemoryMemberRepository];친절하게 오버라이딩 됐다는 문구를 볼 수 있다.
✅스프링부트 실행
@SpringBootApplication
public class  CoreApplication {

	public static void main(String[] args) {
		SpringApplication.run(CoreApplication.class, args);
	}

}
✅스프링부트 실행 결과(충돌오류O)
***************************
APPLICATION FAILED TO START
***************************

Description:

The bean 'memoryMemberRepository', defined in class path resource [hello/core/AutoAppConfig.class], could not be registered. A bean with that name has already been defined in file [C:\Users\hotay\OneDrive\바탕 화면\study\core\core\out\production\classes\hello\core\member\MemoryMemberRepository.class] and overriding is disabled.

Action:

Consider renaming one of the beans or enabling overriding by setting spring.main.allow-bean-definition-overriding=true
아래와 같이 정리할 수 있다.
✔️스프링 프레임워크에서는 수동으로 빈을 등록하면 자동 빈보다 우선권을 가지게되어 오버라이딩 된다. (충돌오류X)
✔️최근 스프링 부트에서는 버그를 잡기 쉽게 하기위해 수동 빈 등록과 자동 빈 등록이 충돌나면 오류가 발생하도록 기본 값을 바꾸었다.
✔️application.properties파일에 spring.main.allow-bean-definition-overriding=true를 등록하면 오버라이딩 할 수 있다.